 Gallery walls are one of my favorite ways to add personality and style to any room. Instead of sticking with a single piece of art, you can mix photos, prints, and all kinds of finds to tell your story right on your wall. Even though gallery walls look free spirited, pulling one together takes a bit of planning. The reward? A space that really feels like yours.
Maybe you have stacks of prints you’ve been collecting, or you want to finally show off those family photos. The cool thing about a gallery wall is that you set the vibe. Whether you want something bold and eclectic, or neat and minimal, there’s a way to make it work for your taste and your budget.
This guide breaks down each step to create a gallery wall that really stands out. With these tips, you’ll get a wall that looks gorgeous and feels totally you.
Step 1: Pick the Right Wall and Gather Your Pieces
Every successful gallery wall starts with picking where it’ll go and figuring out what you want to hang. Not every wall needs a ton of artwork, so a bit of planning here makes everything easier.
Things to Think About with Location:
- How much space do you have? Entryways, hallways, staircases, and behind the sofa walls are all classic spots.
- Is there good lighting? Bright areas show off your art best but watch out for direct sunlight, as it can fade photos and prints.
- Is there enough empty wall? Busy spaces can make a gallery wall look cluttered, so open, neutral walls are usually easiest to work with.
Choose What to Display:
- Photographs: family, friends, or travel shots.
- Art prints, posters, or paintings.
- 3D objects like mirrors, small shelves, woven baskets, or souvenirs.
- Mix of frames, sizes, and colors for an eclectic touch. Uniform frames bring order, so it’s really up to you.
I always pull out all my pieces and lay them on the floor near the space. This way, I can see what I have and what will look good together. If you want inspiration, check out gallery walls online or scroll through social media for ideas that match your aesthetic.
As a tip, don’t be afraid to include unexpected objects, such as vintage keys or record covers, which add layers of meaning and personal style. These kinds of objects help your wall stand out and keep things interesting for you and your guests.
Step 2: Map Out Your Gallery Wall Layout
Jumping right in and hammering nails usually leads to a messy wall. Mapping things out first helps you see the big picture and avoid regret holes.
Easy Ways to Try Layouts:
- Lay everything out on the floor to play with arrangement and spacing.
- Cut out paper templates for each piece (old newspaper or wrapping paper works) and tape them to the wall using painter’s tape for zero damage.
Popular Gallery Layout Styles:
- Grid: Even rows and columns, all same size and shape. Simple and neat.
- Centered: Biggest piece in the center, smaller ones around it. Good for a focal point.
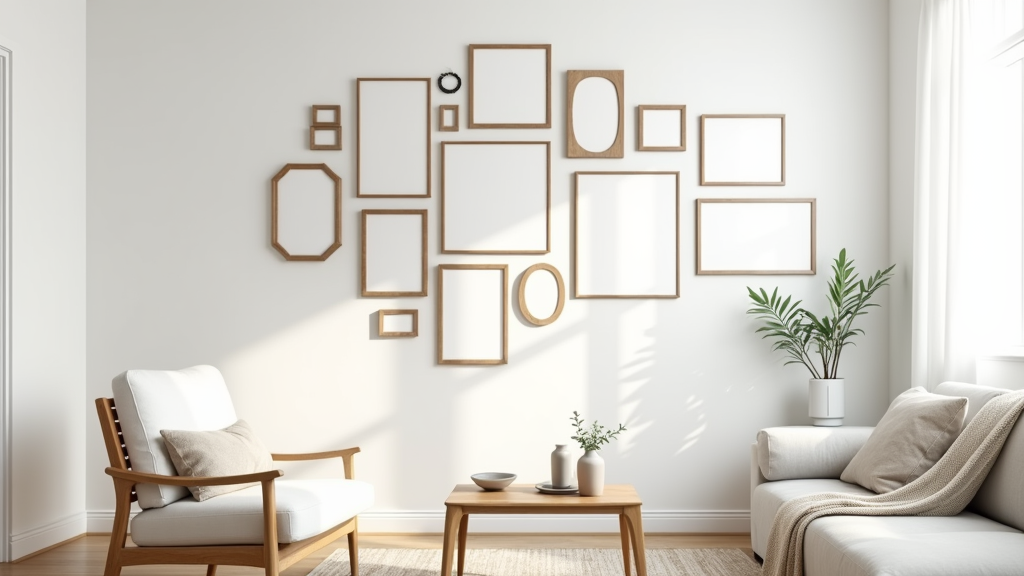
- Eclectic Freeform: Mixes sizes and shapes in a loose, organic way. Feels casual and creative.
- Linear: All pieces align along a straight top or bottom edge. Great above sofas or headboards.
When laying out, I aim for about 2 to 3 inches of space between each piece. This gives enough breathing room, but not so much that the art feels isolated. You can tweak these measurements to fit your wall size and your style.
If you’re working with a very large wall, try grouping your art into clusters for extra interest. Or, for a smaller wall, go with just three or four pieces to keep things from getting crowded.
Step 3: Prep Your Artwork
Once you have your layout, make sure each piece is ready to hang. Don’t skip this part—it’s pretty annoying to have to fix a crooked wire once it’s already on the wall!
Tips for Prepping:
- Clean glass and dust off frames.
- Add picture wire or sawtooth hangers to any art that needs hardware upgrades.
- For photos or prints: use acid free mats to keep them looking good for years. This step makes even affordable art look fancy.
- Check weight limits if you’re hanging heavier items on drywall. Wall anchors can save you lots of future headaches.
Whenever possible, add those little sticky pads to the back corners of frames. They’re inexpensive, keep things from shifting, and protect your walls. Plus, these pads help your frames sit flush—which adds polish to the whole display.
Before moving to the next step, double check that your frames are sturdy and the hanging hardware is snug. This gives you peace of mind and helps keep your wall damage free over time.
Step 4: Hang Everything Like a Pro
This is the big moment. Starting with your anchor piece helps set the placement for everything else.
How to Hang Without Stress:
- Find the middle of your gallery wall and start with your largest or main piece there.
- Work outward, staying mindful of your planned spacing.
- For straight lines or grids, use a level for perfect alignment.
- Pencil marks for nail or hanger placement keep holes in the right spot, and just lightly erase when you’re done.
Extra Tricks That Work:
- If you’re worried about putting too many holes in the wall, Command strips or other removable picture hooks are awesome for lighter frames.
- For heavy mirrors or big art, use a stud finder for extra stability.
- Keep step stools and a measuring tape close by. It saves time going back and forth.
Don’t forget to step back every so often as you hang and check your work from a distance. Sometimes the wall will reveal imbalances that are hard to see up close. Making small changes at this stage is much easier than after everything is finished.
Step 5: Style and Refresh Your Gallery Wall
Once everything’s up, take a step back and make sure it feels right. This is the fun part. Make little tweaks until you love how it looks.
How to Make It Pop:
- Mix in sculptural or unexpected items for texture, for example, wall planters, hats, or macrame.
- Adjust the lighting. Adding a small spotlight or placing a lamp nearby gives the whole display a warm glow at night.
- Swap out pieces once or twice a year as your tastes or the seasons change. This keeps things feeling fresh.
I like to add a single new item every now and then. Something picked up on a trip or even a little thrift store find, for example. That way, the gallery wall keeps feeling personal and new.
Answers to Common Gallery Wall Questions
What if my art is all different sizes?
You definitely don’t need everything uniform. Just aim for balance: spread out both the big and little pieces so one area doesn’t look heavier than the others. Paper templates or the floor layout tip come in handy here for making adjustments until the look is right.
Can I make a gallery wall with renter friendly options?
- Removable hooks and strips work well for lightweight frames.
- If your landlord says no nails, lean frames on shelves or a ledge for a similar look.
- Pegboard or grid panels can be hung with minimal holes and can handle lots of swaps.
What if I don’t have a lot of artwork?
Mix in mirrors, fabric pieces, postcards, or wall baskets. You don’t have to stick with traditional art. Anything meaningful can take its place on your wall. DIY pieces, kids’ art, and even pretty textiles make for great conversation starters and help build a collection over time.
How often should I update my gallery wall?
There’s no rule. Some people refresh their wall once each season, swapping in new favorites as the mood strikes. Others like to keep a more permanent display, updating only a piece or two as their art collection or photo albums grow.
Wrap Up and Quick Start Checklist
A well designed gallery wall adds instant character to any room and lets you show off your style. The process is all about planning, playing around with arrangements, and going with what makes you happy. There’s no single look that fits everyone, so use your creativity to make it your own. A flexible approach means you can tweak your wall as your style evolves.
Get Started with These Steps:
- Pick your wall and gather a mix of frames, art, and objects.
- Lay out your arrangement on the floor or with paper templates.
- Prep your art for hanging: dust, add hardware, and check for stability.
- Hang starting from the center and work outward, keeping things balanced.
- Step back, adjust, and enjoy your new favorite view at home!